I adore my Steam Deck, it’s become more favoured than my Nintendo Switch for the handheld gaming at home or on the go. However……I’ve always wanted more storage, and with the base 64GB model, space is at a premium.
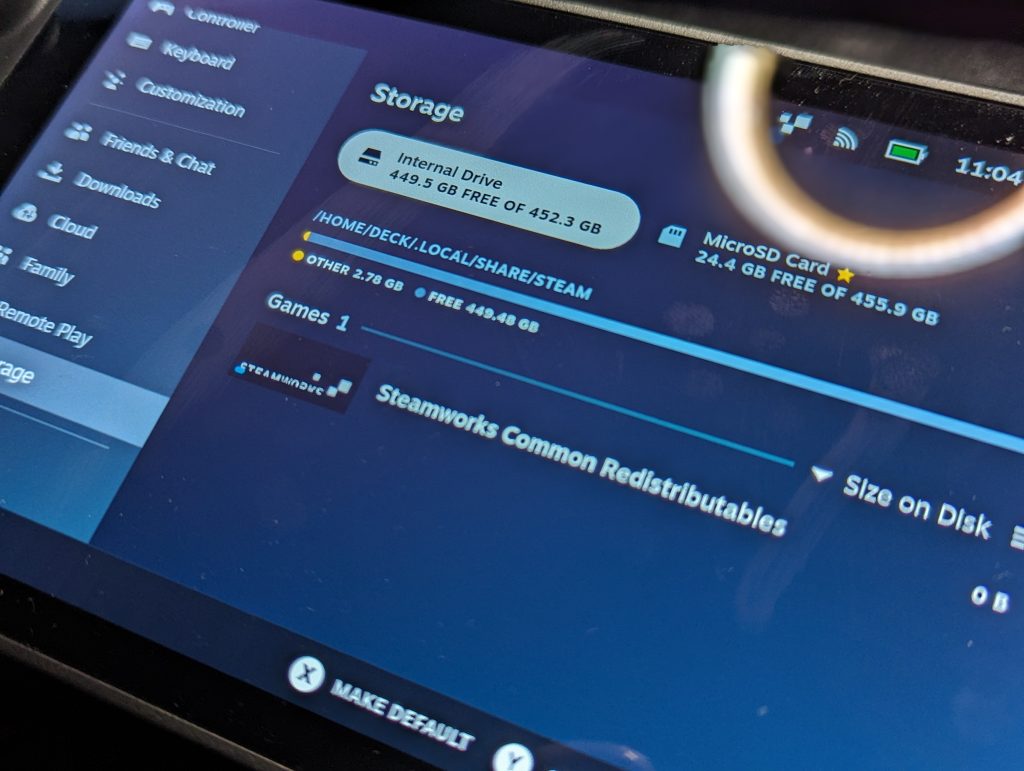
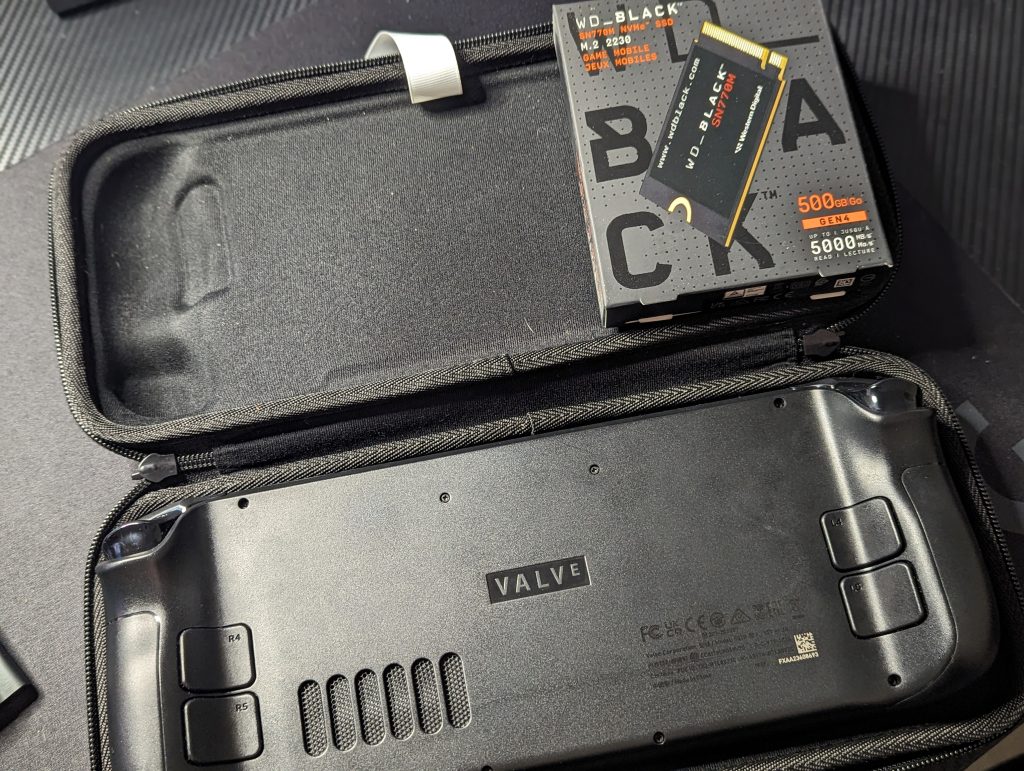
Sure, I’ve added a great 512GB memory card, and it’s been amazing. But all that storage on the internal drive used up on shader caching has had me twitchy. So I pulled the plug and got a Western Digital Black SSD, rated for exactly these types of system.
We do love a computer hardware projects here. So I watched videos and read guides, and I’m pleased to say the Steam Deck SSD transplant was not only a success, but it’s an easy process!

Essential Tools for the Upgrade
Before diving in, ensure you have the right tools at hand:
- Phillips Screwdrivers: A #0 (PH0) and a #1 (PH1) are crucial.
- Tweezers: A must-have for handling small components. and for peeling back the some of the foil stickers.
- Flathead Screwdriver: Opt for a 1.2mm head to easily remove backplate screws, particularly the two bottom screws which are more accessible with a 1mm flat head than a #1 Phillips.
- Prying Tool: An old plastic card, a plastic opening pick, or a spudger will do the trick. Think phone screen kit, plastic tat.
- SSD: It’s your choice and the market is ripe for the picking right now. I went with the WD Black, but the Sabrent options look excellent value for money.

Upgrade Procedure
- Preparation: If you have an SD card installed, remove it to avoid damage. Place your Steam Deck in its carrying case for protection during the upgrade.
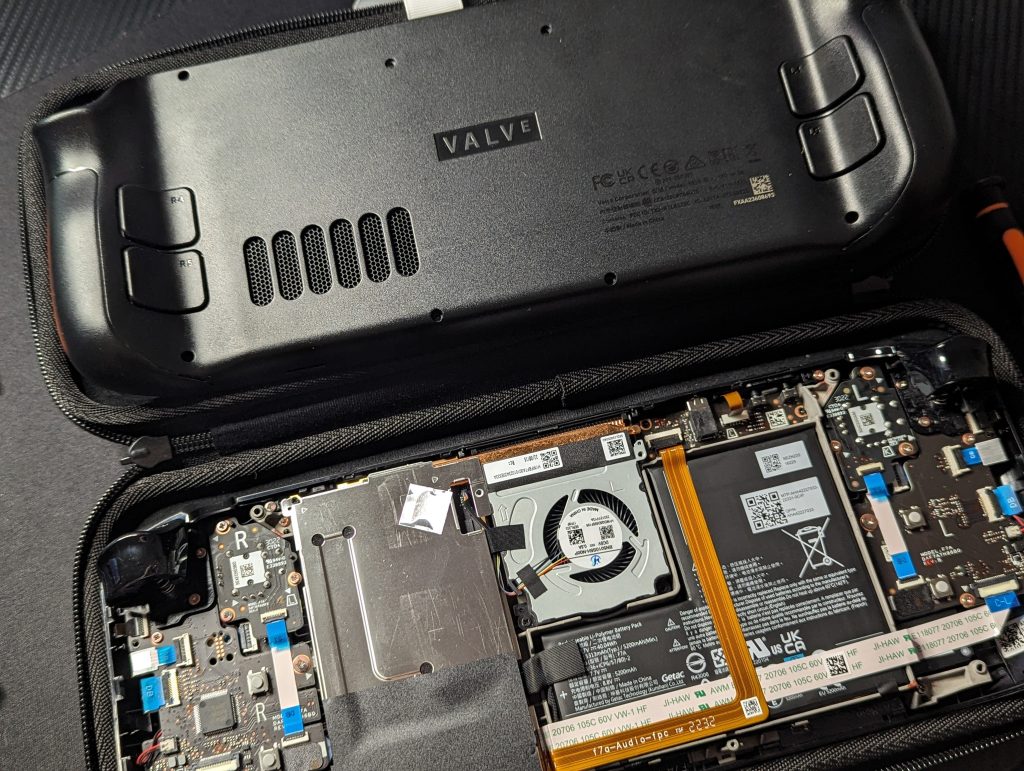
- Removing the Back Plate: Unscrew the eight screws securing the plate. Utilizing a 1.2mm flat head screwdriver here makes the process smoother.
- Opening the Deck: Gently pry open the back cover, starting from either side grip. Carefully unhook the locking clips (use your guitar pick or spudger!)
- Board Shielding: Remove the three screws holding the board shield, with one hidden under a metal foil. Carefully peel back the foil with tweezers to access and remove the screw.
- Disconnect the Battery: Before touching the SSD, disconnect the battery by freeing and pulling the battery pull tab. This is a bit tight, but persist with just your fingers if you can. Less chance of internal damage to your Steam Deck.
- SSD Removal: Unscrew and gently remove the old SSD. Don’t forget to detach the electrostatic discharge (ESD) cover.
- New SSD Installation: Place the ESD shield onto the new SSD and insert it into the M.2 slot. Secure it with the screw without over-tightening.
- Battery Reconnection: Reconnect the battery, ensuring the connector is fully inserted.
- Reassemble Board Shielding: Replace the board shield and secure it with screws, making sure not to pinch the fan cable.
- Close and Secure the Deck: Clip the back cover in place and screw it down, ensuring there are no gaps.

Post-Upgrade
After successfully upgrading your SSD, you can either transfer a clone image of your old SSD or reinstall SteamOS. The entire process should take no more than 30 minutes, but it promises a significant performance boost for your Steam Deck.
I re-installed SteamOS from a recovery image and it was a dream (once I had a high-speed USB stick, don’t use USB 2.0). Here’s what I did
- Download the Recovery Image: First, grab the recovery image here, which initiates an immediate download. This image is essential for reinstalling SteamOS on your new SSD.
- Prepare a USB Key: Download Balena Etcher (free software) to write the recovery file to your USB drive. The process is straightforward; select the recovery file without altering any settings. Note that Etcher will format your USB drive.
- Boot from USB: Insert the prepared USB drive into your Steam Deck. I used a dock, but you could use a USB-C Adapter. Shut it down completely. To do this, navigate through Steam button > Power > Shutdown. If the Deck is unresponsive, hold the Power button until it turns off.
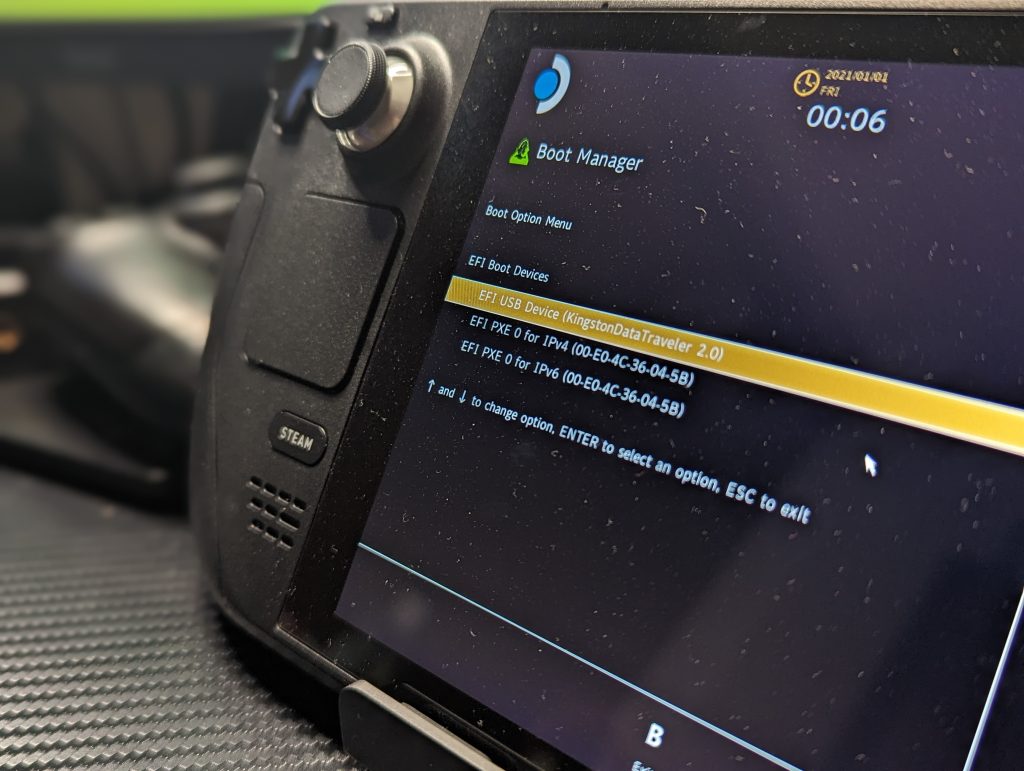
- Enter Boot Manager: With the Deck powered off, press and hold the Volume Down button, then press the Power button. Release the Volume Down button upon hearing the chime to enter the Boot Manager, where you’ll select the EFI USB Device to boot from.
- Desktop Environment: The Steam Deck will boot into a desktop environment, which might take a few minutes. Use the trackpads and the R2-trigger to navigate.

Options in Boot Manager
Once in the Boot Manager, you have several choices, depending on your needs:
- Re-image Steam Deck: This option performs a factory reset, wiping all data and installing a fresh SteamOS. It’s the best choice for a clean start post-SSD upgrade.
- Clear Local User Data: Select this to remove all user data, including games, settings, and personal files, without affecting SteamOS itself.
- Reinstall Steam OS: This reinstalls SteamOS but aims to keep your games and personal content intact. However, the safety of your data isn’t guaranteed.
- Recovery Tools: These tools allow you to modify the Steam Deck’s boot partition if needed.
Because it’s a new, blank drive, select “Re-image Steam Deck” then follow the on-screen instructions carefully to complete the process.
That’s it! You’re done.
If you’ve ever reinstalled Windows or another OS on a computer, it’s the same. Remember, the Steam Deck is literally a portable PC. It’s easy, Steam have done a great job with the recovery options and image. You’re laughing.

All done
As hardware upgrades go, I expected the Steam Deck to be a faff. Small form factor computers can be a pain, with everything so tightly packed. But it was actually really easy, fun, even.
The biggest issue I faced was that my boot image was n a slow USB drive. Replacing that fixed it immediately. Opening and replacing the SSD in the Steam Deck was a breeze and then the SteamOS Image did the rest of the work.
Now I’ve got room to hold more games, and hopefully get on that backlog of the games that I’ve never played.
I’m really pleased with how it turned out, and hopefully this guide will help you have a good time doing it, too!

